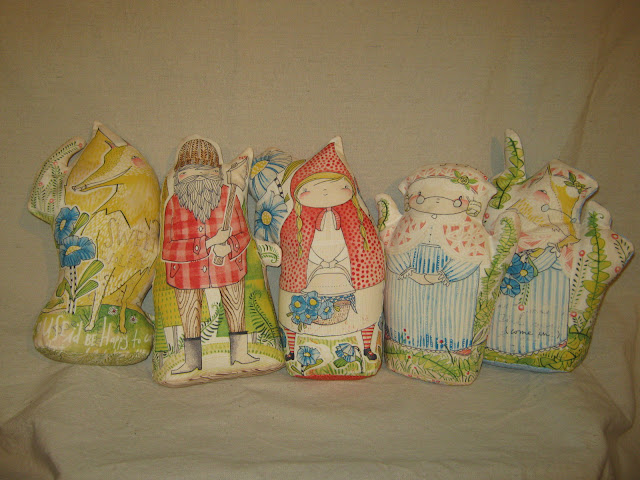
How to Make a Stuffy that stands up!!
I promised
&
Now I deliver!!
Are they pretty cute?
I think so, gonna get started.
Making character stuffy/ pillows/plushies is really fun and
simple to do. And if the fabric is as
cute as this “Little Red” by Cori Dantini for Blend Fabrics, then these pillows
will steal your heart!!
As a designer I hope to be able to show you a few tips that
will enhance your maker/sewist skills!
To get started, here is a list of materials that you will need.
Materials needed:
-One Blend fabric panel of Little Red Characters
-Matching fabrics to complement the character, 1/3 Yard per
Character
-Muslin. 1/3 Yard for 1-3 characters
-Fiber Fill, I recommend Silky Soft Ultra Plush Fiber Fill
-White Thread
Then I cut a muslin to match the front and the back of the stuffy. the muslin acts like a stabilizer, and the stuffy feels super soft & strong at the same time!
Measure the bottom edge of the puppet, multiply that number
by 2, and that is the amount the diameter of the bottom needs to equal. In the next step I will show you how to do
that.
Find a object with a round bottom, I used this wooden spool
that is about 2.5” wide. I used the
spool to draw a half circle. I measure
the perimeter of the half circle, and double that. Going back to step Three, I have the
measurement of the bottom; it needs to equal the perimeter of the bottom
piece.
If the stuffy bottom equals 10”, and 2 x the half circle=
6”, then 4” must be added to get the correct bottom piece size. Now trace the half circle. From the center top and bottom of the half
circle draw 2 straight lines 2” long (2 x 2 = 4), and then draw the other side
of the half circle to complete the bottom piece which will be cut out of the
backing fabric along with a muslin backing.
I used this spool to make all the bottom pieces for each stuffy. It was perfect because when I had all the
stuffy characters finished, they could all stand on their own!!
With all the pieces layered (character & back, right
sides together, then sandwiched with the muslin on both sides so that there is
4 layers) pin around the sides and the tops!
Then starting at the bottom of a side, sew around the edge
up to the top and back down the other side, but leave an opening so that the
stuffy can be stuffed. If you look at
this picture closely you can see where the opening will be on the left side Do not sew across the bottom because we need
to add the bottom and need it to be open.
Next trim the edges down to 1/8-1/4”, clip to the corners, and around
the round edges!!
In this picture you can see the opening on the left side. Now pin the bottom to the bottom edges, start with matching the centers of the front & the back to the centers of the straight sides of the bottom piece. Then match the side seams to the center of the curved sides.
And this is what is meant by sewing on the top of the front & the back. As seen in the picture, by pinning up through the bottom, the top can be sewn, otherwise the pins would be in the way if it was pinned from the top. If there are little tucks & pleats caught when sewing a circular item to 2 sides, it is okay because it will help the stuffy to stand up.
Time to Stuff!!
This is the fiber I love to use for stuffing. It is so soft and really makes a difference
in how the stuffy feels!! Make sure to
stuff the little corners and points first, before filling it to the brim…we
want all parts of the stuffy to be full and not at all flat!
I think the sweet wolfie is my favorite!!
my And here is the whole gang!!
Thanks for reading,
Sewing hugs for the new year!!,
xo,
Cheryl


Comments