How I Modified a Sweat Shirt & Made it My Own!
Sweatshirt Mod.....
Last summer I got this really cool sweatshirt from
at shopjacintagreen.com
Here is the link to this exact same sweatshirt.
I loved this sweatshirt because I adore Josephine Baker.
She was an amazing lady and gifted entertainer.
She left the United States to go on tour in France and enjoyed
great success as for her famous 1927 act performance of the "Danse Sauvage" wearing a
costume consisting of a skirt made of a string of artificial bananas.
She loved Paris...and her country, until she came back the US
to preform on Broadway in 1936.
It was a heartbreaking run as she was not accepted in the US as she was
in France.
Leading her to return to Paris and to renounce her US citizenship
and become a French citizen!
Josephine Baker was a true civil rights activist and
contributed to finding justice in France, the US, and Africa.
Did you know she spoke at the "March on Washington"
with the Rev. Martin Luther King.
She did what she believed in and she inspires me.
The sweatshirt is made of great material. The kind of sweatshirt material that is
soft and warm against your skin.
Just one great sweatshirt.....but I wanted to make it something a little different....
This is a Free People sweatshirt. I love that the neck is wider...and I love the straight bottom
& that the back hem is longer too!
So I decided to make the sweatshirt something that I would really love!!
What I love about working with knit fabrics is that they don't ravel.
So I can create with raw edges and that allows me make fun design decisions!
I used this top to established how long I wanted to the top and sleeves to be.
I liked the edging of the side vents here, and used that idea in my modifications.
First thing...cut off the neck, bottom hem, and sleeve bands.
I like to loosen it up a bit!
I decided to reuse the bottom hem band. I pinned it so it did not lose it shape and I could cut off the serged end. And before I cut, I did a roll of stitches to help hold the edges togehter
I has a pink stretch velvet that I decided to use to rework the sweatshirt.
I cut 3/4" strips (from the width of the fabric)
I pinned one strip in the center front on the neck as shown below.
It is simply pinned down, no edges were turned under...just layered right on top of the fabric.
I sewed along each edge with a 1/8" seam allowance (sa).
This trim allows me to make a 1" deeper neck opening.
I also used the bottom hem band to sew onto the neck for a unique neck finish.
I sewed with a 3/8" sa, then a 1/8" sa topstitch, with the seam allowance towards the body.
Sleeves.
I did not want them so wide, so I trimmed them.
And I trimmed them even more after this pic.
I decided I wanted to mix up the materials.
I used fabric strips to make sporty-like athletic stripes.
I made sure the strips were 2" longer then the width of the sleeve.
The fabrics I chose were thinner knits, so I backed them with a thin white knit.
Therefore the weight would of the sleeve addition would equal the weight of the sweatshirt knit.
I also top stitched the sa to each side of the seams.
Top stitching is so very important to help garments maintain shape
through it's life of wearing and being laundered.
Plus....I am hard on my sweatshirts too.
All the top stitching.
On a design note....I used the pink velvet, then a contrast/matching knit.
Here is the top stitching on the inside, and you can see the thin white knit backing too.
Once the stripes where sewn on the sleeve,
I trimmed the strips the the same size as the sleeve width.
Then sewed the sleeve seam.
I created the new cuff,
but it would not be sewn to a gathered sleeve, but flat with an easy ease.
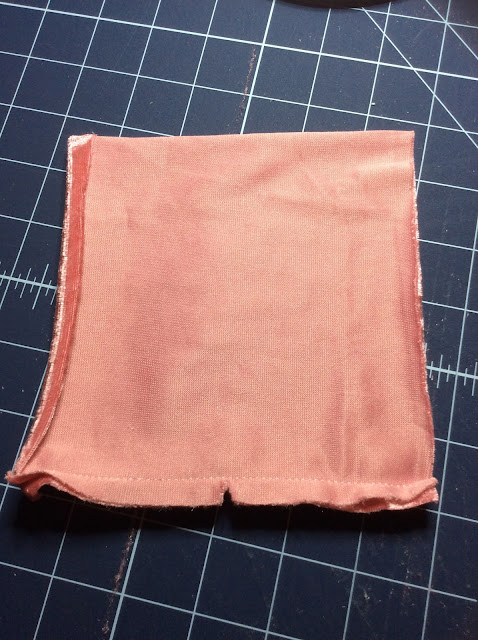
The cuff was one long piece, that will be folded.
The clip is where the cuff will be folded and helps to ease the fold.
The cuff is as you can see made out of the pink velvet.
Once the cuff is made, it is then sewn onto the sleeve end with a 3/8" sa.
Then was top stitched with the sa facing away from the cuff with a 1/8" sa.
The next step was to sew the 3/4" strips on each side to create a side vent.
Once the strips where sewn into place, I cut the vents.
Then I cut the front 1" shorter.
The last thing I did was to sew a new hem/band.
I cut strips wide enough to fold in half.
I had 2 strips, one for the front, and one for the back.
After many times of not having enough length of fabric,
I developed a technique....so I am never short of fabric ever again.
We have to remember that sometimes fabric moves or stretches
so there is too much or too little of ease.
This technique allows for a perfect length regardless of the ease.
For these cuffs, I fold and sew up one side.
Turn it to the right side and pin it to the bottom as if both sides are sewn, but after I have pinned the length, I add the sa, then cut of the extra.
Then I sew up the other end, and pin then sew into place.
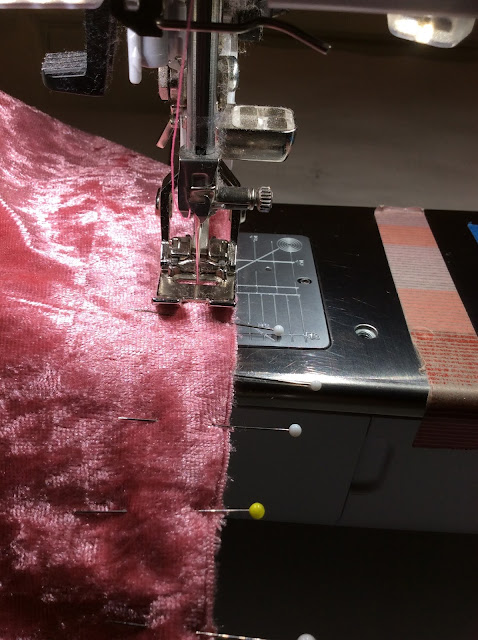
Here is the start of pinning with the one finished edge.
More pinning.
This pink velvet was curling, hence the gazillion pins.
Reached the end + the sa, then cut extra off.
Now sew the edge up!
sewing finished, now turn right side out!
Ready to pin, then sew!
Topstitch.....
FINISHED!!
I really love this!!
I have been wearing this and it is super comfy!
I really love the fit too!
This is what it looks like on!
Really digging it!!
Have a great day!!


Comments