The Gospel of Faux Leather.....Day Three.........Grommet no more, introducing the Strap Slot!!
The Gospel of Faux Leather
Day Three
Strap Slot Tutorial!
The strap slot above is a cool way to incorporate a graceful entry for a strap to pass through, not to mention a really cool look!!
So....let's get started. As seen here, cut a 2" X 4" strip from your pleather of choice.

I mark a chalk line in the center this way first

And on either side of the center line 1/8" away chalk another line...

And it should look like this.......

Next, chalk a line 1-1/8" on either side of the centerline, opposite of the first set of lines that were chalked...exactly as you can see below....

This is the type of chalk roller I use....it makes pretty sharp lines.

So this is a fabric sample sandwich of what the side of one of my handbags may feel and look like to show how this is done. And you can see the sewing progress, and recognize which side the strap slot is started and then finished on.... FYI...the exterior floral fabric is Field Day By Alison Glass.....super awesome fabric! The lining fabric is an organic from Clothworks!

So now it is time to chalk a line on the lining about 2.5" from what would be the top of the bag.

And after centering the pleather piece using the center lines chalked to a side seam in the handbag if this applies, tape the pleather piece in place to hold it securely....it is so easy to think you have a hold of this piece...but I have been fooled....and after I have sewn it, I have found that oh yes...it did in fact shift, then I have to redo....
anyway, please tape it!!
Generally I use my BERNINA # 1D foot to sew this step with the dual feed as I am going through a number of layers.
As you can see I started sewing it at the top and am being very careful to make sure I am accurate on the corners as I stitch on the outer lines of the chalked box. I like to use a 2.5 stitch length. I like to have a little smaller stitch so that I know this is going in securely. If I need to I stop sewing and leave the needle down, and raise the presser foot to see where I really am at....

And you can see where you are at.....

And here is another look........

Almost done stitching the box..........finish by back stitching 4-5 stitches, and then 2-3 forward. Clip the threads closely.
Sewing Tip: Never start sewing at the start of a seam, where there may be a stress point. Here I started about 1/3rd away from the corner. By starting here, once I have clipped my threads closely and using a smaller stitch, and starting not at the corner where it will be a stressed area, my thread ends are then "buried", and will not reveal themselves, because they are far enough away from the corner.
Use this same technique when sewing a seam....start about a 1/2" forward from the "real start" of a seam, then backstitch to the real start of the seam, then stitch forward, and your thread ends will always be buried.

ok...so once the box is stitched, then it is time to cut the center to allow the flipping over of the pleather. Do so with a very sharp pair of nips, so that the clip can be accurate to the corners, and not clip your stitchline.....

Clip, clip, carefully Clip, and then about 1/4" from the end, diagonal clip to each corner to get as close as possible without clipping the seam at the corners or anywhere else for that matter!!

This is what it should look like after clipping.......

Now you can see the diagonal cuts to the corners....

And now pull those edges of the pleather on the lining side through the just cut center to the exterior side, and prepare to do the final stitching to secure the pleather down.

Using the #52 Teflon Foot to glide over the pleather....but...there are so many alternatives......click here for the list of feet that can be used for sewing on pleather in general, and for other pleather textures.
Onward to sewing......as seen in this close-up, I like to start about 1/2" from the corner on the top, as I know this will be hidden when the strap loops through the strap slot! I topstitch around the center opening with a 1/8" seam allowance........Take your time and make sure to turn the corners with the needle down! I do not pin here, but if needed, the strap slot pleather could be pinned by pinning first into the fabric under the strap slot, then coming up with the pin to catch the felted back of the pleather to hold it in place. I actually hold the pleather as I sew it. This involves making sure that the pleather is fully turned out so that a bit of the lining can be seen at the center opening. I adjust as I sew around the center opening, basically the 1" or so in front of where I am sewing, until I have stitched the entire pleather box edge.
Once the center opening has been secured with topstitching, then it is time to topstitch around the pleather edges, again with a 1/8" seam allowance. Again starting at the top where the strap will cover up the start/finish stitching.

Another view of the finished strap slot.........

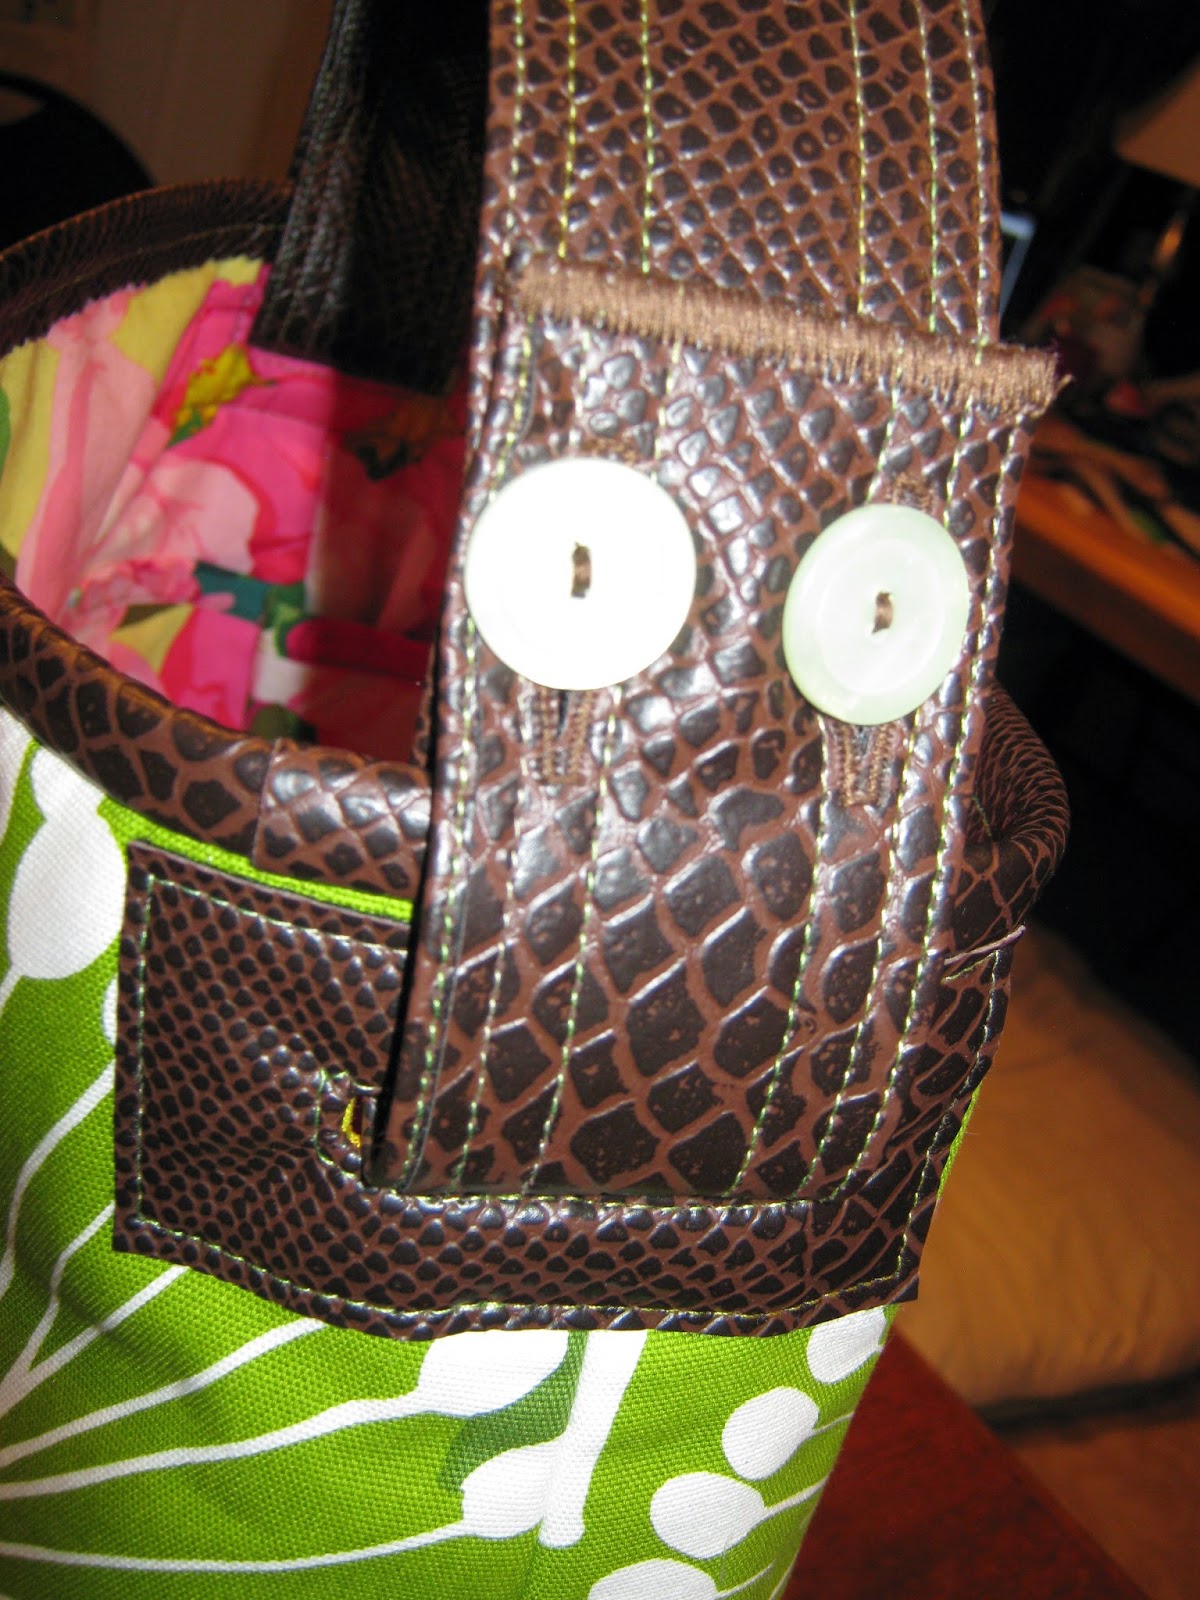
Here is a strap through the finished strap slot!!

Here is another look........

And maybe a better view here........

I believe that pleather makes the fabric super rich looking!
Thanks for reading....would love to hear your feed back...especially you have any additional questions that I may have not covered.
I appreciate you reading!!
Tomorrow the Gospel of Pleather will conclude with Day Four, How to Insert a Mighty Handsome Magnetic Clasp with Pleather Details!!
Also....stay tuned for a chance to win a handbag kit from Paradiso Designs!!


Comments