Method Monday, No. 9, Easy Tips for Sewing (Yes it is sewn) a PDF Pattern Successfully Together!!
How many of us have struggled to tape PDF pieces together?
perhaps everyone....
I have seen so many on Instagram talk about their frustrations about their "taping gone wild" escapades!
I am hoping these following tips will help this crummy task become a little easier....
I found this really cool wrap skirt pattern on line for free.
This is a new company, Made Label.
When I saw this free pattern for
the Frankie Wrap Skirt I thought it looked marvelous...
I downloaded it, figured out my size (be warned, this runs small).
Here is how some of the pieces look once printed.
Here is the pattern cover.
I think the pattern is really well done.
And below the pattern cover I have included the link if you would like to download it too!
And the instructions are a video tutorial!
Isn't it soooo cute?
Well....go get it Here!!
Last year Anthropologie had a wrap dress, the skirt part of the dress looked exactly like this.
And hooray...I love a wrap skirt with ruffles more then a wrap dress!
This is the main pattern layout page.
It is great that Made Label shows the illustrations for the pieces you will build.
You can see exactly where each piece goes,
and the number placement matches the layout here.
Before we get on the pattern assembly, lets talk good tools for building PDF patterns....
Below I have a paper cutter...I use it all the time
for my own pattern design and assembly.
It is slick and quick to use.
If you buy a paper cutter, make sure to buy 2 extra blades now.
Products come and go and it may be hard to find the correct paper cutting blades.
Then tape is a necessary surgical paper need.
And the job just got easier with the use of a rotary cutter.
Notice the rotary cutter is marked to use only for paper.
Once you print out all the pattern pieces, organize them forthe different pieces.
Then make separate piles for each section within each piece.
So grab your first 2 pieces.
I used the 4 & 5 pattern pieces of the side panel below for example.
#4 is the left piece, and #5 connects to #4.
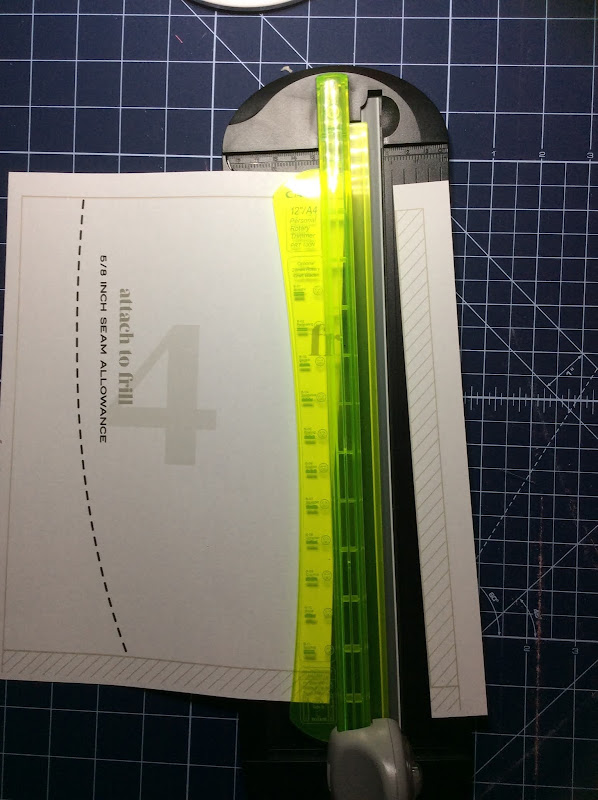
But first a little trimming. The right edges and bottoms will be cut off.
I only do maybe 2 pieces at once so I do not get the pieces mixed up.
See how the paper cutter works as I trim both pieces.
Cut from the sides first.
Then the bottoms!
Now #4 & #5 are trimmed.
And the top extra will go under the top roll.
And the left side will connect under the next piece on the right.
Then I tape to baste/hold the pieces in place to hold through the next step.
I am picky and very careful to get these pieces dead on.
If you get them lined up correctly, then the pattern will be flat.
And that becomes important as the pattern is built.
Next I SEW those pieces together...carefully.
A few rules.
1- Do not sew past a cut edge/line, where ever there is the cut line, stop before the cut line.
another way to look at it, sew only within the pattern.
I used a 3.0 stitch length
2 - Back stitch...reinforcement is everything, just like 2-3 stitches.
You can see this in the next photo, that I sewed up to the cut line,
and back stitched at the beginning and end!
Same with this seam.
Here is how those sewn pieces look once they have been assembled.
I have one more important tip to share.
In the next picture you can see how I used tape to hold the pieces together before sewing.
This is the top of one skirt pattern piece.
I like to trim the paper off as soon as possible
(easier to trim off of small pieces before they become bigger),
but since this top portion is not attached to the bottom sections yet.
I left those last bits until I have the next sections attached, and can trim in one cut.
I think this leads to more accuracy!
Here is how each section is then added.
The beauty in this method it to make sure the pieces are laying flat before taping,
again to insure accuracy.
I like to tape the intersections too.
Here I am adding the last section.
See how I have not cut the edges yet, until I have all the sections intact, then I will trim!
I wish you an easier journey to building your PDF patterns!!
And for easy storage, layer all the pattern pieces, biggest on the bottom, smallest on the top.
Roll them up, use a fabric strip to secure.
Do not forget to use a post it to label with the name/size.
This helps me immensely to know what I have.
Thank-you for your time for reading!!
xo, cheryl


Comments
Punk Jewellery, Hip Hop Steel jewellery