A NEW Patchwork "2Harlow Skirt" with Panel Hem Finish + 2 Awesome Sewing Tips!
If you look on my 2Harlow Instagram post
you will see this picture!
Here is a list of my Paradiso Designs Sewing Pattern #2harlowskirtformula Attributes:
-Any Paradiso clothing pattern with the word formula in it
means that the pattern is ALL sizes inclusive.
-The construction involves strip cutting the skirt pieces. This allows for a
little more accuracy with cutting out pattern pieces.
-The formula is an equation to add in your measurements to
land on the size pieces/strips needed to cut to fit you!
-These designs are also perfect for panel fabrics!
-With these styles I invite hackable/patchworky (yep I decided this is a word) fun stuff to happen!
-The waist is elastic, meaning comfy!! This post will also provide
my most updated technique to make an elastic waist casing,
and a pretty cool stitch-up with the elastic to make it more comfortable.
-#2Harlow means 2 different skirt styles, each with unique pockets.
-There are 2 ways to finish the hem of both Harlow skirt styles,
I will provide a bonus 3rd option a " midi"/technique hem finish in this post that is not in the pattern,
as I developed it after publishing.
You can purchase the 2Harlow Skirt Formula here!
SO....
I had an opportunity to work with some new fabric
by Shayla Wolf of Sassafras Lane Designs
for Windham Fabrics.
This link will take you to their website and they are selling yardage
of this "Summer Lovin" collection.
I love pink + orange combos, so this patchwork makes me happy!
But I did not have enough fabric to make the skirt as I wanted, BUT
No big deal!
I actually was going to make this way more buzy....
but the strips for the front looked great.
I could clearly see the design, so I went with it.
Here is the finished skirt out of #summerlovinfabric!
Front
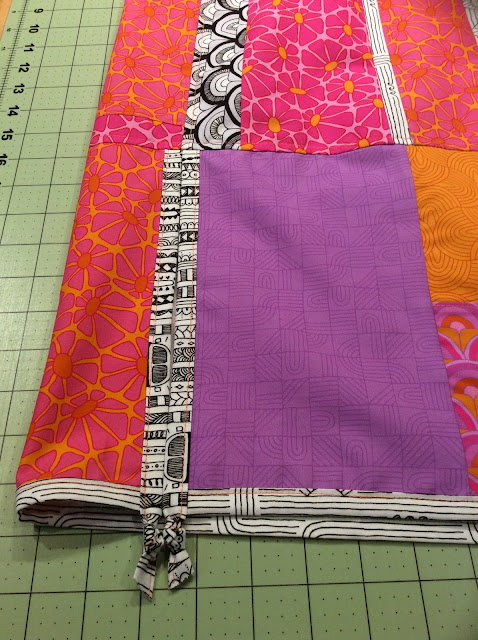
Notice the fun hem trim!
Back Hem Detail
Close up of hem detail
As you can see I had strips of the #HexieDaisy Fabric.....
I followed the pattern instructions to use the formula to figure
out the sizes I needed for length & width of the strips needed to cut.
I wanted a midi length, so my length for the skirt yoke + body had to hit me just above the knee.
Then I inserted 1.25" strips of the white/black prints in between my colored fabric strips.
I used all different prints for the 3 middle strips.
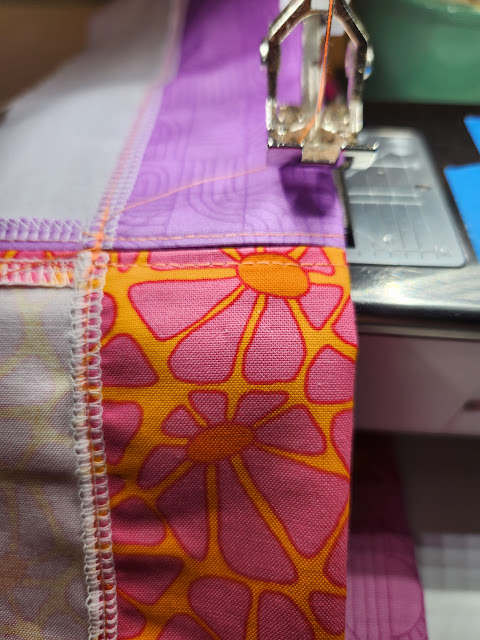
*one thing to note is that I serged the pieces of the patchwork
to eliminate raw edges.
Used the more dense curved prints that "frame" this front & back panels and
complete the front & back panels for the correct width.
Then the pockets sandwich the front & back to complete the skirt,
as shown below!
Here are the fabrics for the hem panel.
This will become the back!
I only had to add in a top edge seam allowance since I was adding this trim detail to the raw edge.
Then I picked fabrics for the panel that would fit the circumference of the skirt body,
with respect for one detail that I love!
As seen above I measured for 2 bottom hem panels.
One is the length starting at the edge of the pocket to the other side pocket edge.
The second is the width of the back skirt panel only.
Do not include any seam allowance in this circumference.
To assemble enough pieces to make this hem bottom & also the skirt yoke I pulled
all the pieces with colors that work well together.
I cut pieces for the yoke and then for the bottom hem panels.
This is the piece for the yoke, after joining the pieces (except the center back seam)
I serge one edge of the fabic, do not forget that prints are right side up!
I also serged the edges as seen at the photo bottom.
This yoke will have an elastic waist and this is how I make the casing!
I am using 1.5" elastic, and I like to make the casing 2".
This leaves room for the elastic to have room to move thru casing
and for the top stitching I do to help the elastic stay in place.
Below the top 2" of the back seam is not sewn.
I iron the seam allowance, then top stitch it into place.
To prep to sew the casing keeping in mind that I have a 1/8" seam allowance
to sew the casing in place I measure for a 1 7/8" line where
the casing top will follow.
I have painters tape so I can draw these lines to follow.
The casing start!
Notice the casing has this opening where the 2" were not sewn on purpose.
Small break to pet my pup Jackx!
Sewing the casing and measuring to maintain that 2"
Next I will sew a 1/8" topstitch to frame the elastic.
Then take the yoke and attach to the skirt body top.
Make sure the casing opening is at the center back of the skirt body!
Elastic will be added in last step!
Next is to finish the hem panels as shown in the picture below!
Kinda fun to have the patchwork as shown for the back panel!
When I cut the bindings at 1 7/8".
Measure the length to bind, and cut enough strips...plus 10" more.
For each of the 4 downward edging binding strips here,
they each need to = hem panel length + 4".
Cut to join the binding strips.
Cut, pin, and sew with a 1/4" seam allowance.
Iron the seams open.
Then iron each binding in half,
then tuck each raw edge into the fold as shown...one at a time.
This is what the trim looks like once it is ironed!
To prepared to attach this trim to the bottom of the hem panel,
sew to close the trim with a 1/8" seam allowance.
The machine foot acts like a 3rd hand to hold the trim!
Then slip the hem panel into the trim,
then sew on with a 1/8" seam allowance.
Cut the trim even with the hem panel edge.
As seen here, I do not measure this.
I pin the panel to the skirt body bottom to get the exact amount of the piece.
It is measuring without measuring!
Next to sew on the downward binding.
The downward binding will enclose this raw edge.
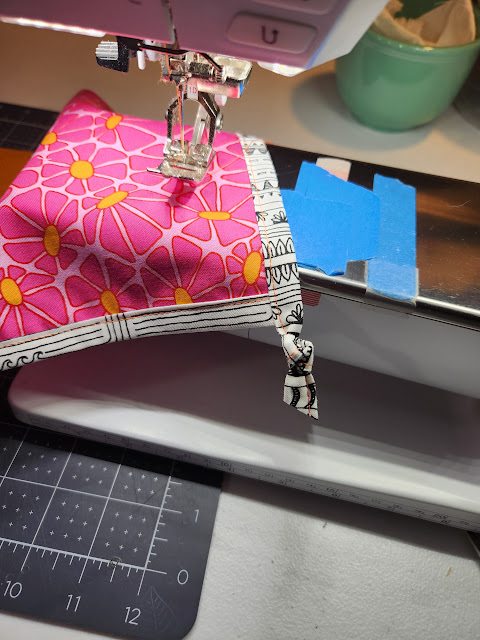
I sew the entire binding.
Then I knot it!
I then cut off the extra! Repeat to finish all downward sides!
Now these hem panels are ready to attach to the skirt body bottom!
Here are the hem panels sewn with a 3/8" seam allowance.
Serge that edge, then flip to right side and topstitch to secure this seam allowance
at the top of the seam with a 1/4 topstitch.
Last step to add elastic.
Thread thru casing.
Once the elastic is threaded thru entire casing it is sewn together.
The elastic will be exactly what is needed.
Do not add any for seam allowance.
Next butt the two elastic ends to each other.
The elastic will need to be pulled out so that it can be laid down to be sewn.
Peek at the next photo.
The frame the two elastic edges to match the foot center line.
Use the widest zigzag stitch and the stitch length should closer.
Slowly stitch while pushing the 2 edges together.
Zigzag the entire length 4 times back & forth.
Then using a straight stitch at 3.0, stitch in the middle to really capture
the zigzags. This stitch combo is secure and it lays nicely!
Pull elastic back into casing, and the 2Harlow skirt is done!
Here is another look at the finished skirt!!
Thank-you for following along and I hope these techniques are helpful to you!
Feel free to ask questions in the comments OR via my website


Comments