Method Monday No. 5 : The Gospel of Faux Leather/Pleather/Vinyl , Day 5 Skinny Straps & Tabs
This is the 5th installment of "The Gospel of Faux Leather/Pleather/Vinyl" series.


I adore pleather/vinyl/faux leather. Can you tell?
When I started designing handbags I knew I wanted to find a material/substrate that I could believe in for straps. It had to be sturdy and considered a workhorse. It had to look good. AND I had to love it.
I found vinyl!! And went on a big quest to find embellished vinyl OR pleather OR Faux Leather.
These are all the names that I know of for this substrate/material that I love.
It is such an important component to my handbag patterns. Especially since over time I have developed some fun sewing techniques to use it for handbag making!
If you would like to see the whole series, just search using "The Gospel of Pleather".
In this series you will see:
-How to sew a skinny strap, meaning less then an inch wide. If you want to make wider straps, that is Day 1 of the Gospel of Pleather series.
-Plus we will cover an easy way to sew tabs. Tabs are the pieces that hold hardware or are used to hold a strap in place.
I sew with a Bernina and I am a ambassador for Bernina. I sew on a B770 Quilter's Ediition that you see here! The foot is a 52D and is coated to provide a non-stick surface...meaning perfect for sewing on pleather. This Bernina also has a system called a dual feed. It is the arm that is directly behind the needle here. It is a walking foot within the machine. If you do not have a dual feed system I highly recommend using a walking foot, which is available for just about every sewing machine.

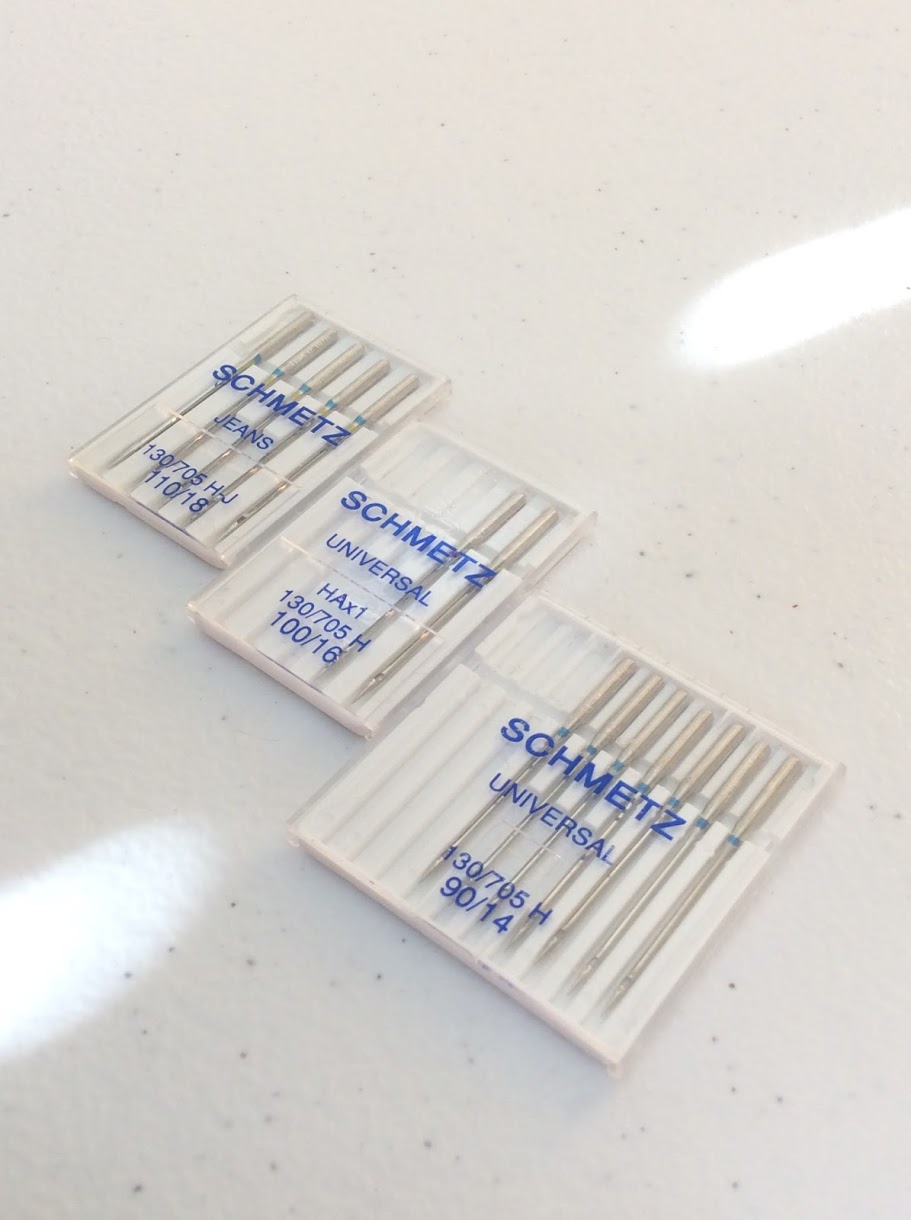
Here are needles I like to use. Basic rule, the thicker the pleather, the bigger the needle. I can get by with the 90 needles, but there are times I need a 100 or a 110. I am one of those gals that likes to keep a supply on needles. It is great to know you have the ability to change the needle to continue to sew with good results!
Change your needle every 8 hours of sewing. HINT: I also take the time to clean under my throat plate and around the bobbin case when I change needles too!!

Step 1, Sample Sew
MOST important task...sample sewing. This gives you a chance to see how the material handles. Check-out stitch length, One of the biggest mistakes is having too small of stitches, meaning a tighter tension and distorted material. Use your clothing and hand-bags that are store bought to get a good sense of how the stitches should look. That is a great starting point to get the look you like. The bottom smaller piece is folded so I could get a sense of how the stitches look with layers.

Here is the strap to be. It is 1.5" wide. Once the strap is sewn, it will be a smidgen wider then 1/2".

Step 2, Draw the Line
First a line must be drawn 1/3 of the width of the strap. 1/3 of 1.5" = 1/2". I used an ink pin to draw the
line. Ink is safe, I have used a Sharpie before and after about 6 months the marker ink leaches through the pleather. For pleather with a dark back I use a chalk roller marker.

Step 3, Prep to Sew 1st Row of Stitching
To prepare to sew I fold and clip the pleather edge right up to the line, but making sure I can see the line. I generally clip on a few clips, then use my fingers to fold the edge to the line. I will then fold as I sew, but if it is easier to clip that works too!
HINT: Once you have your project and foot in the right place, put the needle down & hold the threads before you start stitching. After 2 stitches let go of the threads.

Step 4, !st Row of Stitching
I position the pleather with the fold even with the right side of the foot, and the needle positioned all the way to the right. I generally stitch with a 3.0 stitch length.
I always leave and hold thread tails when I start sewing to provide a tension. It keeps things clean. If threads are not held, bird nests will form due to the thickness of the pleather. Also...never use the automatic thread clippers, it will result in problems and more birds nests.
As each row of stitching is finished, clip the threads. Then you will the beginning with the threads, and the end with no threads.
HINT: Super important to have the entire foot sewing on the project allowing all the feed dog power to move the project as it is stitched!!

Step 5, Prep for 2nd Row of Sewing
Clip the raw edge to the 1st row of sewing, but make sure the stitching is visible.

Step 6, Sew the 2nd Row of Stitching
Position the foot now on the opposite left edge of the fold, with the needle moved all the way over to the left as seen below.


Step 7, 3rd and Final Row of Stitching
Center the strap in the center of the foot, needle is in the center too.
Sew 3rd row of stitching to finish the strap!
Skinny strap is finished!!

The finished strap!!


TABS!
As mentioned tabs are used to hold onto hardware, or these will be loops that the strap goes through. This is one way to lessen the bulk of the tab, so it is easier to sew and attach to the handbag or whatever it is used for.
This is the right side of the tab.

Step 1
On the wrong side of the tab, draw a line that is in the middle.
Whatever size is needed for the tab, start with twice that. This tab finished at 1.5", so 3" to begin.

Step 2, Fold one edge to the center
Position to stitch with a 1/8" seam allowance.
Stitch this close, so there is not much lip to pull up.

Step 3, Repeat for the other side.

Step 4, Repeat on both edges

The edge stitching can be done either way.

Option: I also did a 3rd roll of stitching, to add more stability to the tab.
Below all the stitching is finished.
The strap will be used as is.
The tab will be cut into 4 pieces.

Here is a great "action" photo of the tab and strap in use.
I will be doing a sew a long, but I am going to call it "You can Make a _____!
In this case....You can Make a Daisy Hobo!
Look for it in a few days!!
I cannot wait to show you!
On a last note...I highly recommend fun thread colors. This is a neon coral by Isacord.
Yep it is a embroidery thread, but I love to do general sewing with it,
and it works great!


Comments