Method Monday, No. 7, Elastic Waistbands, 2 Game Changing Tips!!
Well Hello again!!
I thought I would share how I do an elastic waist!!
THIS made all the difference for me.
It allows for complete construction of the waistband WITHOUT the elastic inserted!!
What?
Check out the goods!
Here is my waist band that will become a casing for elastic.
It will be folded in half, then attached to the skirt I am making.
This is the center back seam.
Notice that I have left an opeing, just big enough for the elastic.
At the top the seam is sewn, then there is the opeing, then the rest of the seam is sewn.
This is the elastic I like to use.
I found this, and love it because it is strong and flat and thin.
It generally does not turn either!!
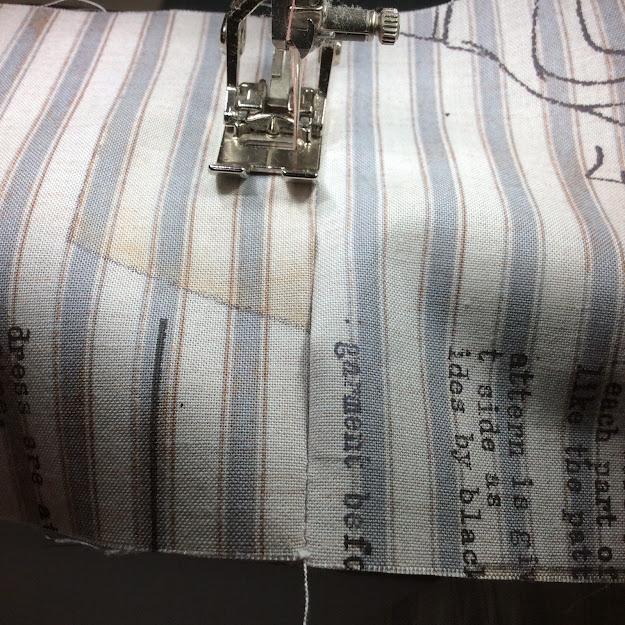
Here is the seam, ironed open, and this is the opening for the elastic.
And topstitching the opening.
FYI....topstitching with cotton/linen/woven fabrics
does a sewing garment good.
It actually helps maintain the shape of the garment in the wash.
And to save a garment more....put in the dryer for a limited amount of time
& hang to finish drying!!
Here is the topstitched seam.
Here is the inside center back of the waistband that has been attached.
Of course the ole' safety pin to insert elastic!
Now the elastic is inserted, then pull out the elastic ends alot to connect the ends.
But this is a different approach.....
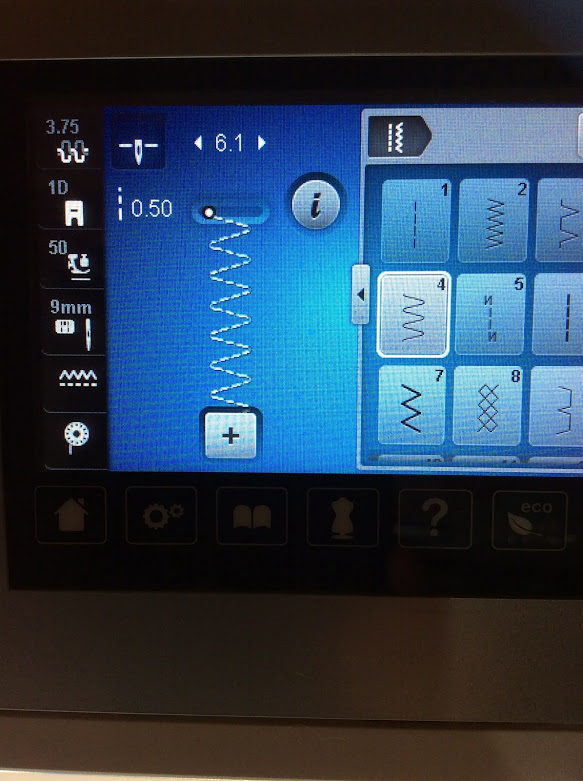
First I set the machine to a 3 step zigzag stitch........
just about every machine has this stitch.
This is the default 3 step zigzag....you make want to go wider...
Make sure that your elastic ends are cut straight and cleanly!
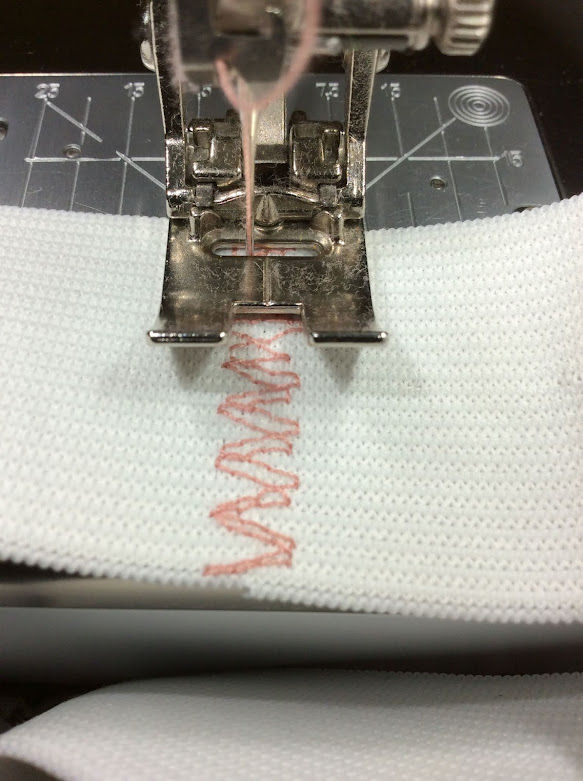
Then butt them up to each other, and where the ends meet
should be centered with your foot center line.
start in the middle of the elastic, it is alot harder to start on an end.
AND...put your needle down and hold those threads for 1-2 stitches.
Make sure to gently push the ends right up to each other.
Stitch down to the end but not off.
GO SLOWLY and breathe.
Go over the seam up and down with 4-6 passes.
Stop with needle up.
DO NOT remove yet......
Now switch to a straight stitch with a 2.5 stitch length!
And stitch right where thru the middle seam to create an even stronger stitch!
3-4 passes should be good!
Now you are done....and the elastic disapears into the casing.
The best part is some times the elastic needs to be replaced.......
AND it can be done without having to rip out one seam.
Here is an example of using the technique on 1/4" elastic.
Yep...it really works!!
Here is the finish.
OHHH...and one last tip......
Top stitch the top of the casing.
I did here with 1/4" seam allowance.
Generally I do 1/8", but this will help to keep the elastic from twisting
& more importantly it will keep the elastic from wearing through the top of the casing!
You are welcome!!
Thanks for hanging out!!!
xo, Cheryl


Comments