Make a Daisy Hobo Bag, Day 2 Sew A Long, All the Exterior Stuff
Well Hello!
Kinda excited and thank-you for coming to visit!
Let's go over all the exterior pieces we need for the Daisy Hobo!
Here is the pieces line-up!

Okay...on day one of Daisy I went over the correct needles and thread and sewing feet.
The next really important thing to do is sample sewing.
If you wish to be successful at sewing different substrates, then you must do your research, and sample stitching to see how your machine works with different kinds of material.
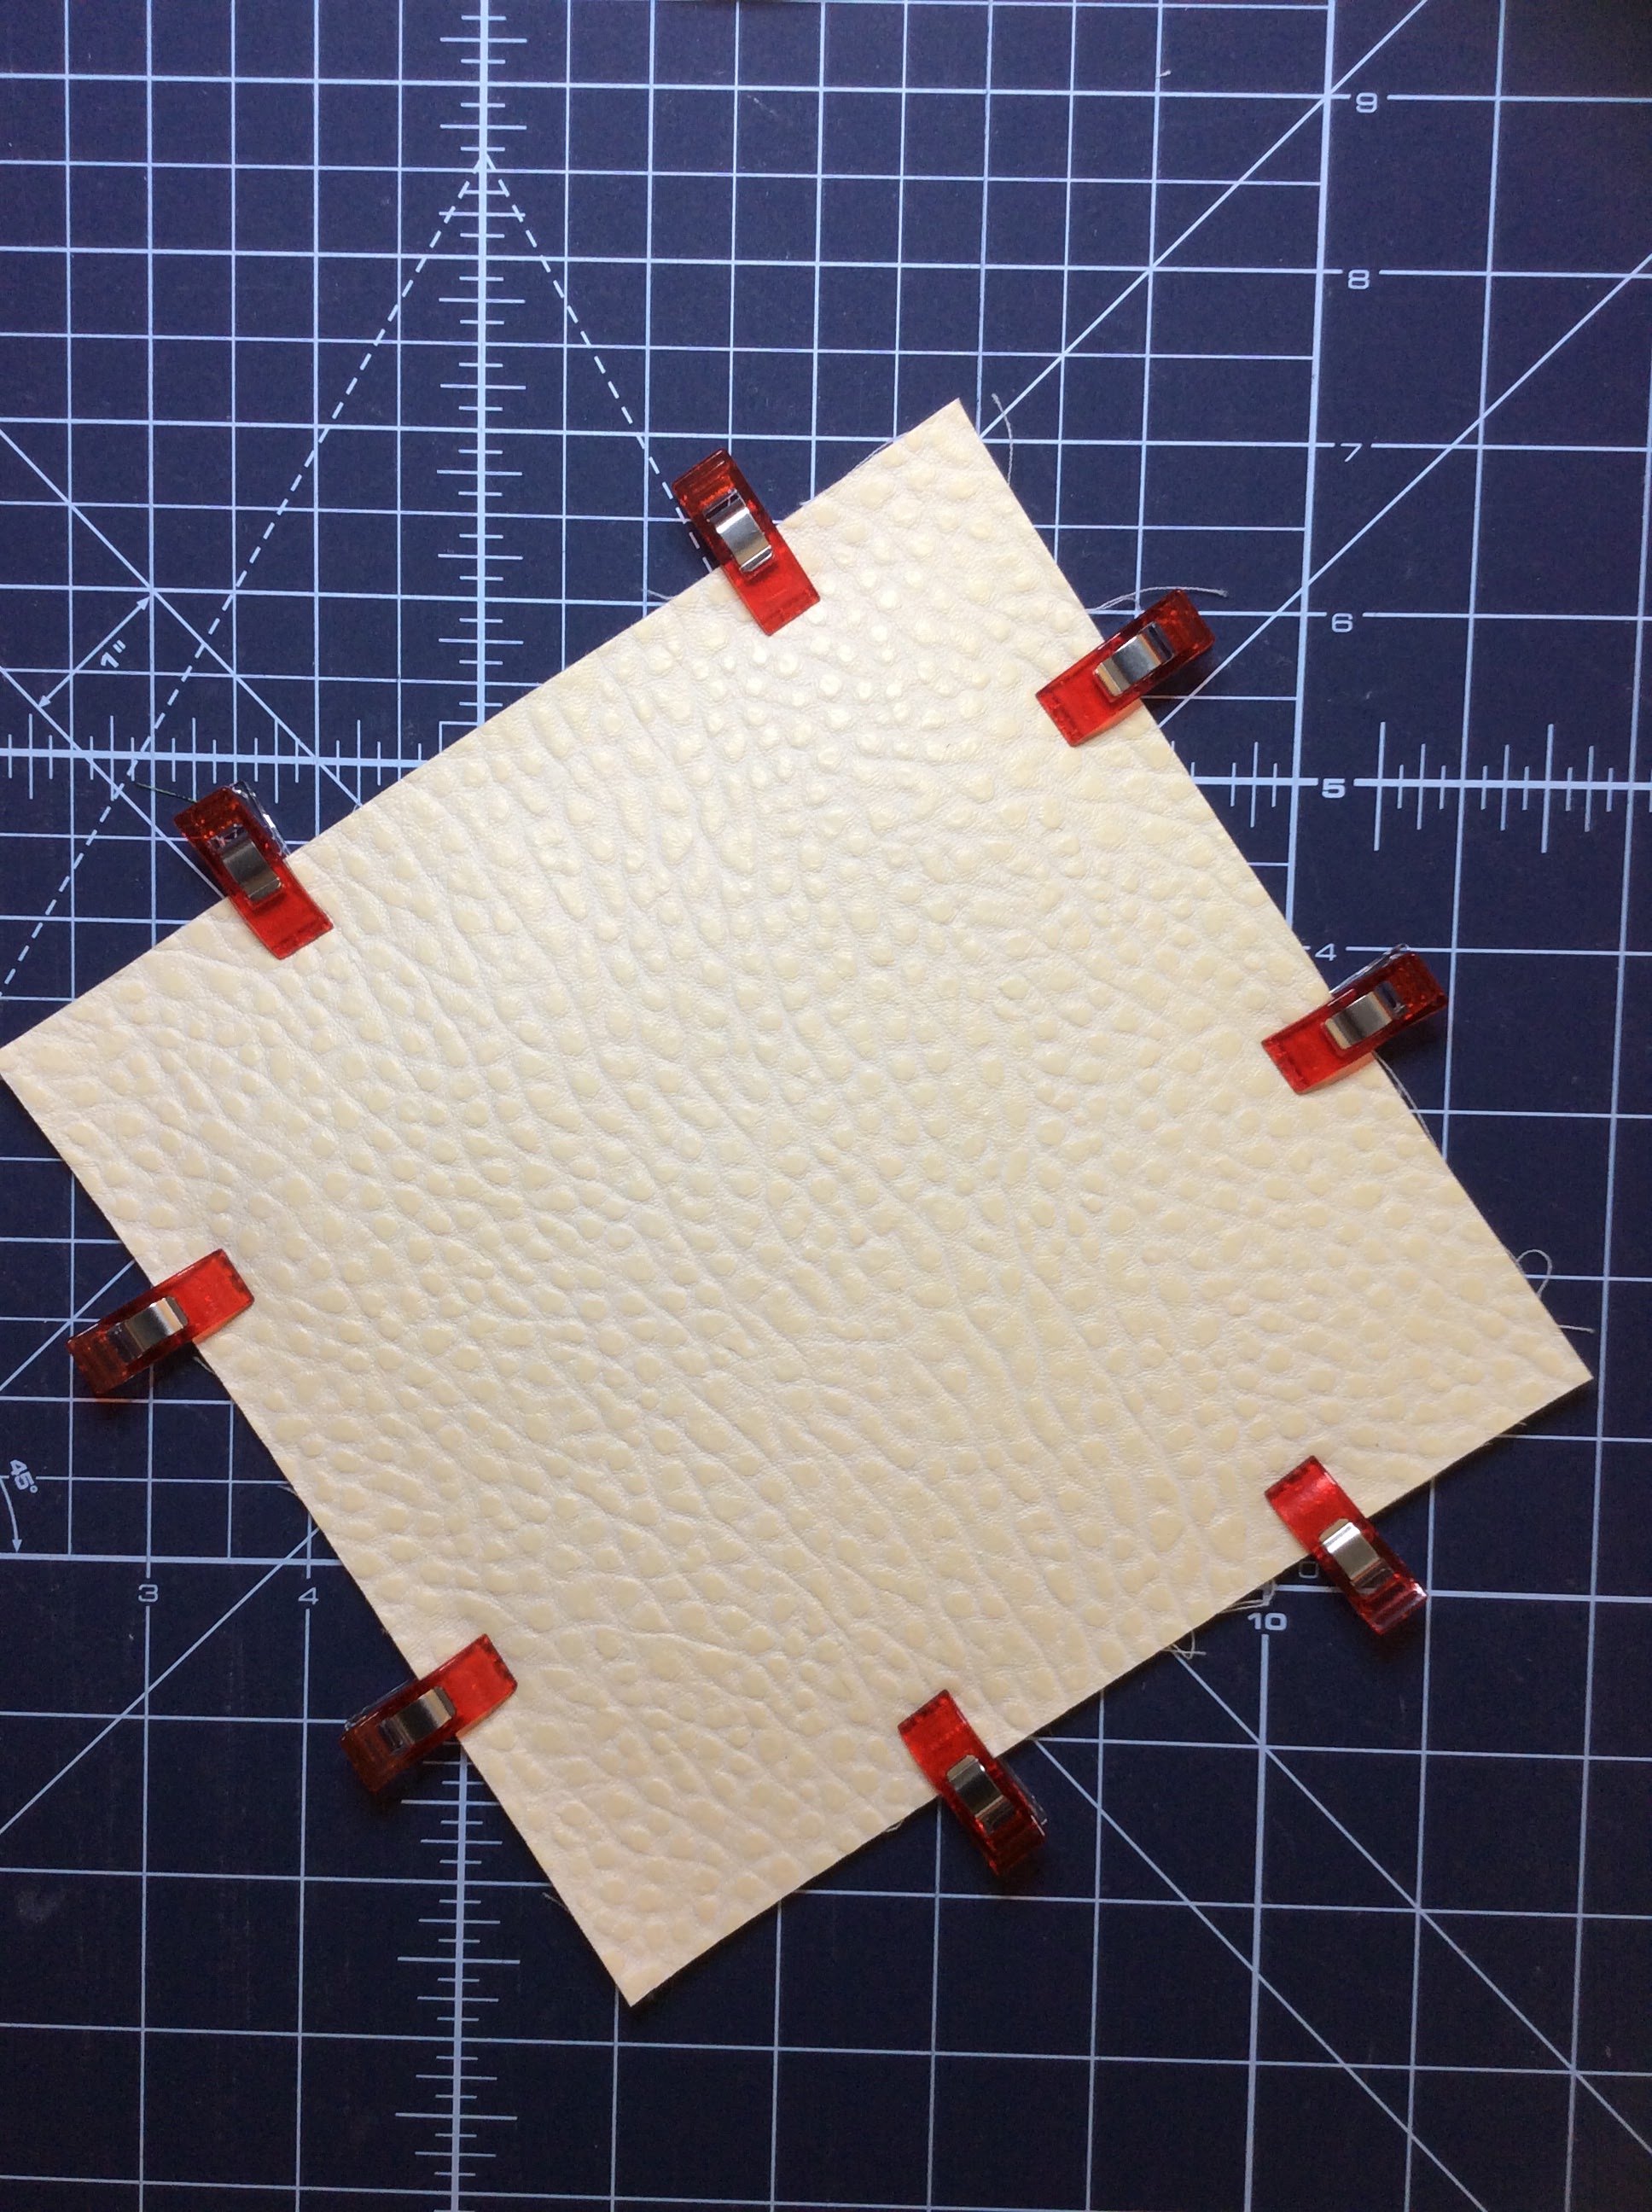
Below is my sample sewing with this crema pebble pleather. I do this to figure out my stitch length...I start at 3.0. Keep in mind this is a thicker pleather and not cotton, so a little bigger stitch is important.
It is possible to rip the vinyl if you have too little of stitches.
So...go do your homework, and then lets sew a Daisy.

Step One:
Sample sew & make the strap & tabs
So the next 2 pictures are working on the strap. I like to get all the pieces ready to put together.
The means the skinny strap &
the tabs, which are the parts that help secure the strap to the bag
I have a series called "The Gospel of Pleather"
that highlights different pleather sewing techniques.
Here is the post to create the strap and the tab for Daisy!
Shop the Daisy Pleather Strap/Bottom Here


Step Two:
Bottom + Stabilizers
The next picture has 2 different kinds of hard interfacing also know as stabilizers.
These are my favs! The white, mat one is called Craf-tex.
The off white one is called Moldable, both are by Bosal.
Craf-tex is great and comes as sew-in which is what I have here.
The Moldable is made to make bowls, but it is one
of the best hard bottom stabilizer I have ever used.

For the bottom I make a muslin sandwich,
which consists of 2 pieces of muslin with the stabilizer.
The Moldable is double-sided fusible.
Shop Daisy Moldable + Muslin Bottom Here
And my big secret to sew in a bottom with ease is that the stabilizer is the size
of the finished bottom minus the seam allowance.
The next picture shows how I am marking where the Moldable will be placed
so that I can iron/heat it up to fuse in place.
I use an ink pen or a pencil as they do not bleed through fabrics.

Here is the Modable placed in the markings.

Here is the Moldable between the muslin ready to be fused.

Here is the Moldabe fused within the muslin sandwich.

Below we have the sew-in craf-tex, and how I make this work.
Shop Daisy Craf-Tex Bottom + Muslin Here
I mark the on the muslin as before, but when I layer the top muslin piece,
I pin each side to hold the stabilizer in place, as seen below.


Now sew the craf-tex in place.
I sew from corner to corner as shown below.

Here is the finished sew-in muslin sandwich!

And now to add the pleather bottom to the muslin sandwich.

And here the muslin sandwich and the pleather are clipped together.
You can see in the view that the bottom can be sewn on easily.

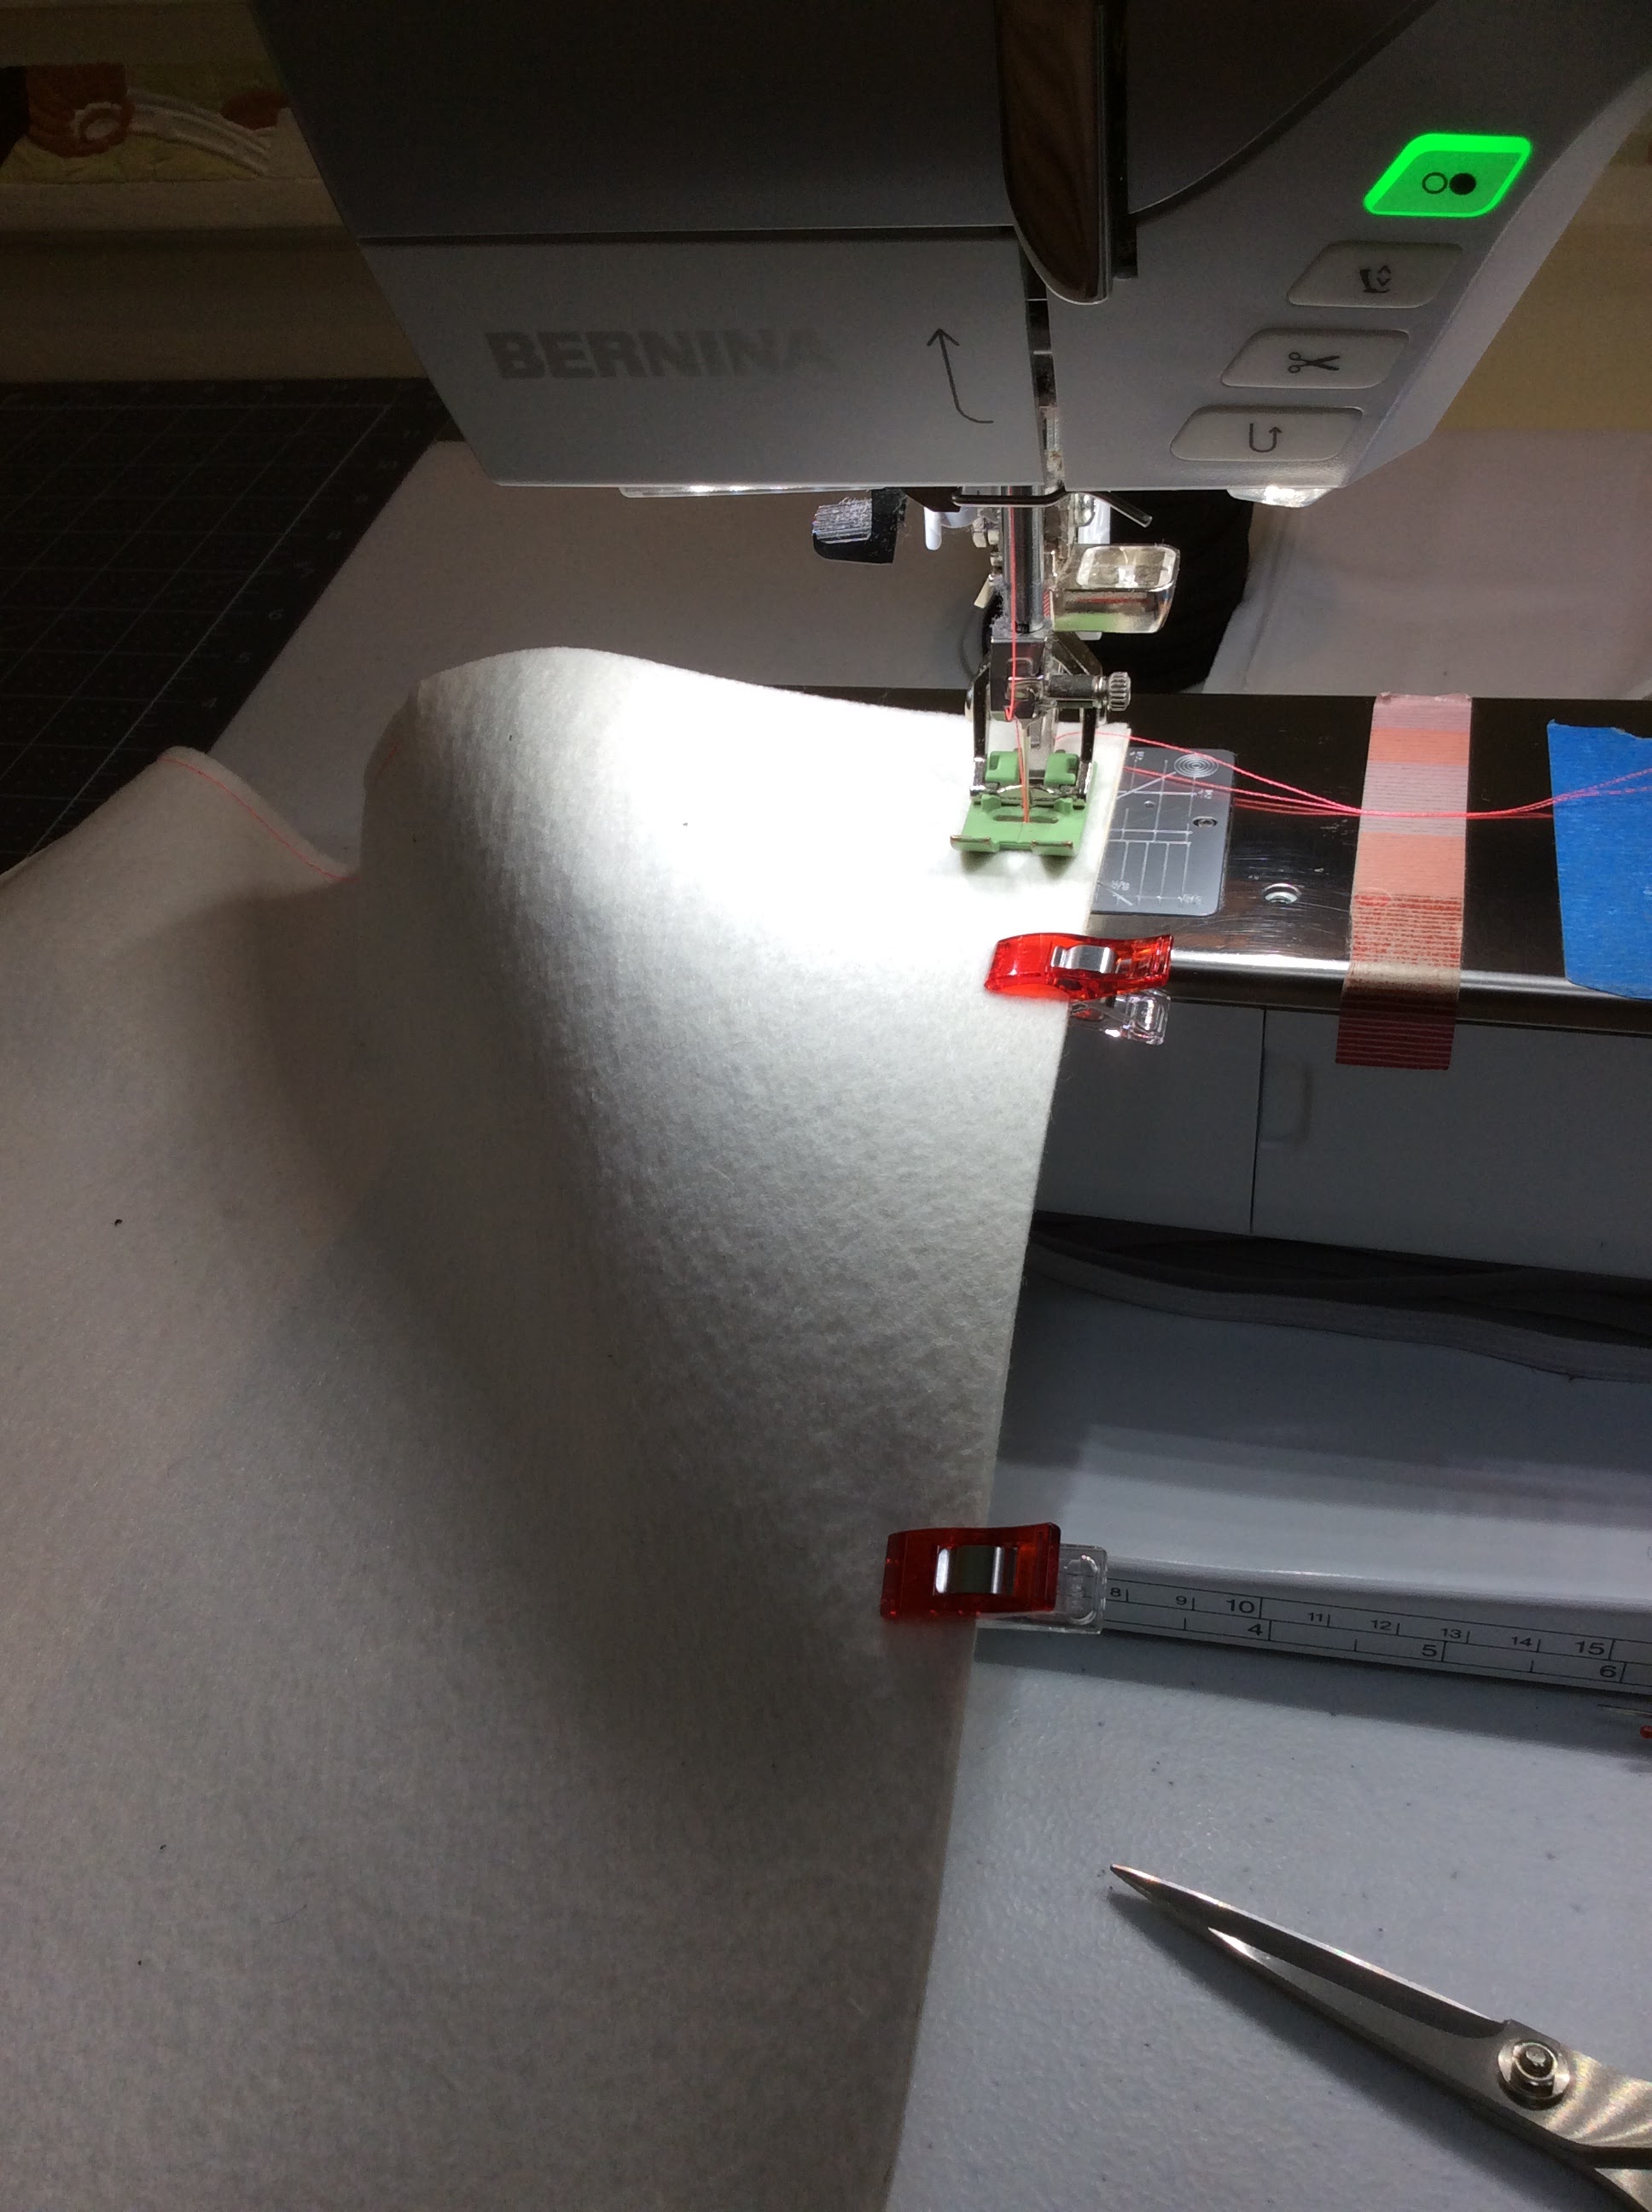
Then using a longer stitch....I use a 4.0 .....

I sew around the edge with the needle moved toward the edge,
then all the layers are held together
and ready for construction!


Step Three:
Construct the exterior
Here are the 2 exterior sides to the Daisy.
Put right sides together and clip only one side to prepare to sew.

Then sew one side seam with a 1/2" seam allowance, remember to back-stitch
at the beginning and end of the seam.


Finger press the seam open on the wrong side.
Then top stitch with the needle moved to the right, with the
right side of the foot at the seam that was just sewn.


Step Four:
Cut & Attach Tabs
The Tab has been sewn and needs to be cut into 3" lengths. There should be 4 tabs.


This is just the view of the backside of the bag exterior with one side sewn.

To find the placement for the tabs (which will be the top of the bag), fold the side edge even with the seam allowance edge to find the middle of each side. So repeat this for the other side. I put a pin in to mark the center, and I pinned in the seam allowance. But honestly a few pins holes will generally not be seen with upholstery grade pleather with will almost close up a hole so that it is really is not noticable.

This shows the middle of each side (where the pins are) with the seam in the middle, and this is where each tab will be placed.

The tabs are folded in half and clipped into place. Each pin is where the middle of the tab,

Use a 4.0 stitch to baste the tabs in place. HINT: Do not sew up onto the tabs, start and end on top of the tab and this will be much easier. Remember to back stitch.

I have dual feed on my machine, so I sewed all the way across,

Now sew the other side right sides together with 1/2" sa.
Now to top stitch the seam....move needle to right with right foot edge on the side seam.
I call this sewing in the tunnel. Start like you see now.

Follow the pictures as I sew down the seam, turn at the bottom, then back up the seam.
As I sew I turn only part of the bag so it is easier to sew.


Now to add the last tab.
Lay the bag as you see here, fold & clip & sew the tab in place.

Clip.

Baste with a 4.0 stitch length.

Step Five:
Prep & Add the Bottom
On the bottom edge, make a 3/8" mark three inches from both side seams for 4 marks total.

This is what the marks should look like.

Find the center of each bottom side edge.
Mark with a pin as shown.

At each make, clip up 3/8".

Now measure and find the center of each side of the bottom.

Now match the 2 middle pins of the sides, and the 2 seams,
to the 4 pins at each side center of the bottom.
Use clips to hold in place. Make sure the flat side of the clip is on the bottom of the bag as shown.


This shows how to match up the pins, then to clip the bottom to the bag bottom.
Each clip is at each corner. The clips split to fit the corner!
Use a 3.0 stitch length.

Fold the bag body towards the corner to keep any folds of the body from being caught in the seam.
As you sew , the body will continually be folded away from the sewing.
Sew up to the corner, and pivot at the corner on a diagonal.
At this point, fold the body diagonally away from the corner.
Generally it takes 2 stitches on the diagonal to reach where you turn to
start sewing the next side of the bottom.
Make sure to now fold the body away from the side to prevent being caught.
It is a constant endeavor to keep & move the bag body out of the way of the stitching.


Match and meet up to where the stitching started.
Then sew around the entire bottom again for strength!

You can see the double stitching around the bottom here.


I personally love how the bottoms fit and
are super sturdy with the Paradiso muslin sandwich!


Thanks again for spending time making a Daisy!
Tomorrow we will tackle the lining!!
Check it out Here
xo,
Cheryl


Comments